Everything I know about using Stable Diffusion
June 17th, 2024
Truthfully - I know very little, so this will be a short post.
The hurdle to using Stable Diffusion (SD) is the sheer number of options available. You have a vision of what you want to generate - but generating an image that resembles it can be a frustrating process. There are so many options to choose from and even the slightest change of settings can drastically alter the result. Paradoxically, this struggle to generate the “perfect image” is also what makes the process quite addictive.
From the perspective of someone who just wanted to quickly generate some images for a small project, this is everything I have learnt and wish I knew before I started.
(1) A machine with a discrete GPU runs SD the best. So you might be surprised to hear that I run SD mostly on my MacBook, a M3 Pro 36GB. I appreciate the convenience of being able to generate images wherever I am. But the performance is not in the same ballpark as a PC and if I needed to generate a lot of images I would use something else. AUTOMATIC1111 is a good tool to start with. The UI for AUTOMATIC1111 is web based so you could even run it headless and access it via another machine, like a laptop from the couch, on the same network. ComfyUI is a popular alternative but it’s a graph/node based UI which adds a level of power (and complexity) that I haven’t needed yet.
(2) On my MacBook I use Draw Things. It’s free and has an active and helpful Discord channel. Consider DiffusionBee as an alternative.
(3) There are a few base models and then a lot of fine-tunes. The ones I have used are SD 1.5, SDXL, SDXL Turbo, and SDXL Lightning.
(4) SD 1.5 generates images at a native resolution of 512 x 512. The community is still going strong but you need to use the fine-tunes to get the best results.
(5) SDXL is a popular choice at the moment because it is much better than SD 1.5 at prompt adherence and one-shot generation. It also generates images at a higher native resolution of 1024 x 1024. However, the generation time can be slow. On a MacBook, it is very slow - around 3 minutes and 45 seconds for one image at 30 steps. There’s also SDXL Base 8-bit which is designed to use less memory, potentially at the slight cost of image quality, but the generation time is about the same.
(6) SDXL Turbo came out after SDXL and is designed to be significantly faster. You can generate reasonable images with a step count between 1 to 4 instead of the 30 steps needed for SDXL.
(7) SDXL Lightning was created by the researchers at ByteDance (the company behind TikTok). They took inspiration from SDXL Turbo, and other related work, and with SDXL Lightning you can generate good quality images at 2, 4 or 8 steps. Turbo is still slightly faster but Lightning seems to have become more popular because the image quality is significantly better.
(8) Confusingly, SDXL Lightning comes in two different flavours: as LoRAs and as full models. Low-Rank Adaption (LoRA) are matrices that can be applied on top of the base model to specalise it further, without needing to retrain the entire model - a very time and resource consuming task.
(9) There are apparently some subtle differences between using SDXL Lightning as a LoRA vs using the full model. For now, I’m using SDXL Lightning (4 step) as a LoRA with SDXL. This is easy to do in Draw Things by selecting the model and then selecting the LoRA.
(10) There are lots of different LoRAs (and models), and https://civitai.com/ is a great website to see example images along with the model name and LoRA used to generate them. LoRAs can stack on top of each other. You can use multiple LoRAs, even stacked with SDXL Lightning, to further specialise the model.
(11) With SDXL Lightning (4 step) the best settings that I found were:
- Steps: 4 (can up to 6 for greater quality but I found 4 to often be good enough)
- CFG Scale: 2
- Sampler: DPM++ SDE Karras
- CLIP Skip: 2
(12) Inpainting and outpainting are powerful techniques. If I generate an image but don’t like part of it, I can use the eraser tool in Draw Things to erase that part. I would then write a prompt box that describes what I want to see in the erased area, and select the 100% strength setting because I don’t want any influence from the existing image in the erased area. The model would then generate the missing part of the image. This is inpainting. If the new generation was good but I want to improve or modify it further, I could again erase a part but this time select a lower strength (e.g. 70%). Some of the underlying pixels would then be used to help guide the inpainting.
Outpainting is very similar and essentially fills in areas of the canvas outside the image. I found these instructions that were very helpful but it isn’t clear who the author is (thank you to whoever you are!).
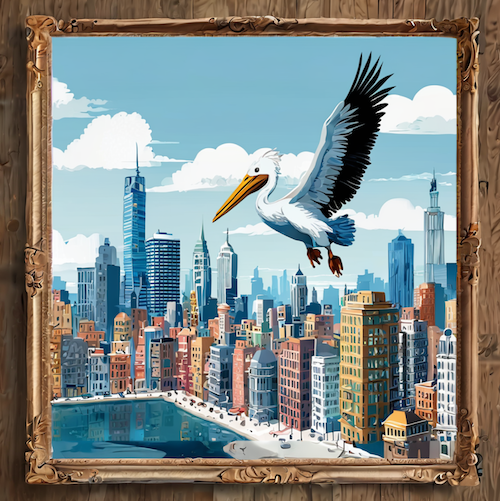
A framed pelican generated using SDXL Lightning (4 step) as a LoRA with SDXL. The initial prompt was “A digital illustration of a city with a large pelican in the blue sky”. Outpainting was then used to fill in the frame.
(13) I found this blog post by Félix Sanz to be a great visual reference of comparing the outputs from these models.
This post was updated on 4th July, 2024 to include some more details I have learnt since the original post.